Showing posts with label Home Projects. Show all posts

Friday, September 28, 2012

What Have I Done?

I'm all about DIY home projects, and I've been lucky that I haven't had that many mishaps ... until now. And, oh boy, was this a costly mishap.

Last February we replaced our carpets with bamboo wood flooring. I absolutely love this floor. It is so easy to clean. I just dust mop it, and clean it with Bona Hardwood Floor Cleaner. What I have learned over the last 19 months after we had it installed is that A) my cats drool, and B) it shows. Our home has a lot of natural lighting so I notice it. It could also be because I'm totally OCD, so I'm cleaning the floors like every day. It was getting old.

My solution to this problem was to put a top coat of something on it. I really should of done a little bit more research before I did what I did. I was in Lowe's and came across Bona Hardwood Floor Polish. Yes! This is exactly what I wanted! I was looking for a polish, not a wax. I thought it was similar to a wipe on product such as Pledge that comes back off it you clean it.

I followed the instructions to a T. I did a small test area which came out perfect. I then prepped the hallway and big room, and got to work. I ended up putting two coats down over a two day period. The result ... I was devastated. I majorly effed up. Even though I cleaned the floors to remove all the cat hair, etc. there was cat hair embedded in a few spots, some areas were hazy, and in the hallway one monster cat decided to walk on it while it was wet so I had paw marks.  Lovely.

Thinking it was like a polish I tried to wipe it off. And wipe, and wipe, and scrub, and scrub, and scrub. After about 15 minutes I had about a 3x3 area done, like 9 square feet. I had 402 square feet left to go.

Top with Polish, Bottom without Polish

I showed the bottle to Chad, and handed him a knife to stab me to death. Surprisingly enough he didn't want to kill me. He felt I was doing a good enough job of beating myself up about it. That's why I love this man. Then he tells me my problem is that the bottle, although it says "Polish" is actually a urethane, also known as  a WAX! I'm really shocked he didn't want to kill me now.

I did the only thing I could do. I drowned myself in chocolate, and called a pro. Two days, three bottles of "polish" remover, and a whopping $500 later our floor is back to what it use to look like.

Lesson learned. Everyone's luck runs out eventually, and polish is not always a freaking polish. That was an expensive lesson. 

Monday, July 9, 2012

I'm Like The Price Line Negotiator

We finally finished our Elfa Custom Closet! (Read more about the first part here.)

A friend recently asked how much we spent on our Elfa closet system. Our design came to $1,747.65 without tax. I caught her mid air when she fainted, which I would have done too if that is what we really paid. We by no means are rich but, we are frugal and savings-crafty.

We originally designed our custom closet in February 2011 and started to pinch our pennies. Our plan was to wait until the Container Store had their Holiday Sale at the end of the year but Christmas came early for us last year. I received an email from the Container Store that said they were having their Annual Shelving Sale. All their shelving was 25% off but since it was only shelving about half our closet design items were not on sale. So we purchased everything that was on sale and waited until they had their holiday sale to get the rest.

The Old Closet
 
Elfa Closet Part Une

Elfa Closet Part Deux
But they don't call me a Frugalista for nothing! We saved an average of 27.5% by shopping when the store was having a sale, but I also cashed in my credit card points for gift cards to the Container Store thus saving us another $450. When Christmas really did roll around we collected another $300 in gift cards bringing our gift card total to $750!

So here is the breakdown:

$1,861.25 total retail cost
Shopping Trip #1: 25% off + $375 Gift Cards
Shopping Trip #2: 30% off + $375 Gift Cards
*FREE Shipping, Delivery & Install

= $688.68 out of pocket


63% TOTAL SAVINGS!

*Since they don't have a store in Orlando, Poppa Dukes was cool enough to pick up our goods in Hallandale Beach, Florida and truck them up to our house. I was also able to get him and Chad to install for free. Well, a bottle of wino for the Dads and back rubs for the Hubs.

Building a custom closet is not easy but anyone can do it with the right approach, adequate patience and enough time.

Saturday, November 5, 2011

We've Been Elfaed

Chad is a semi-horder and I am a full blown organizational-holic. I should also note my other half has double the stuff I have and obviously isn't as tidy as I am. Due to his larger than Erica-sized clothing and semi-hording tendencies he began to slowly take over MY side of the closet. During the selling of the furniture/ new carpet phase our of Home Improvement Plan of 2011, our closet became a friggin' mess and I was starting to have minor panic attacks over this unsightly mess.

Please note open area and see photo below.
The rest of the stuff that was in our closet that was temporarily relocated during the carpet switcheroo.

We eventually moved most of this stuff back into our closet after the new carpet was put in but it was recently taken out to make room for Part 1 of our Elfa Closet.

We filled an entire bedroom. Holy snikes!
The Old Closet
Freshly Painted
The Men hard at work.
Hello Elfa ... wink, wink.
Before
After
Next up .. Elfa Part 2! I can't wait!!

Thursday, September 8, 2011

I've Been Bamboozled

Ever have decorating-block? I don't know why I have such great ideas for others but when it came to our house I had a good case of decorating-block.

The corner of our bedroom is a lonely one. I attempted to fill in the oh-so-lonesome place with a mirror once. It didn't work. I vowed to myself not to look at that dark and dreary hole until we got some new furniture. Well, the furniture came and our little junction was still without a function.

The Old Lonely Corner
The New Old Lonely Corner
My Aunt suggested that we get something big and tall, like a faux bamboo tree. Why didn't I think of that?! Duh! I went searching for a faux bamboo tree which is a lot easier said then done. First of all I couldn't find any at our nearby stores and secondly the ones I saw online were a ton of money which I was not willing to spend on a tree, especially one that wasn't even real.

In a last ditch effort I dragged my unwilling husband to Old Time Pottery. I found a pretty good selection of trees that didn't scream "I'm fake!" like a set of new shiny boobays. We did find a fake bamboo but it was quite wimpy. I almost settled on a ficus but it just feel right. I think faux plants look great in other people's houses but I just couldn't picture one in mine.

I left Chad to play Angry Birds while I went from end to end at OTP looking for ideas for our holy hole. I found some super tall sticks which made me remember this twiggy thing I saw at Ikea.

Ikea Insipration
With my husband and sticks in tow I was off to find a vase which I soon found out was even more difficult than finding a faux tree. Since the sticks were so lengthy I needed a tall vase so the whole thing wouldn't topple over but one with an opening that wasn't so ginormous like a planter.

As much as Chad hates to go decor shopping with me, this is exactly why I drag him with me ... I miracously found a tall enough vase for the sticks at Home Goods. Hooray! That was until it rolled off the back of the seat and shattered into a bunch of tiny effing pieces. I had to go to another Home Goods on the opposite side of town to find another one but this time around  I wasn't taking any chances. Safety first!


After all that hoopla this is what I was left with. The Leaning Tower of Twiza. Sure the vase will stand up and not wobble on a flat, hard surface but carpet? That would be a no-go.

The Leaning Tower of Twiza


The good news is that I spotted not one but two faux bamboo trees in the 2nd Home Goods store. With promises of candy and back rubs I got Chad to come with me to check out the trees and we got one! Was it love at first sight? No, more like like-at-first-sight. We are still in the "getting to know you" stages of dating but so far it is starting to look like the beginning of a nice relationship.

The New New Not-So-Lonely Corner


Saturday, August 20, 2011

Whimsical Peacocks

I was on the hunt for fun curtains for our bedroom which I soon discovered was a daunting task. I looked online, at Ikea, Ross, TJ Maxx and Target but I didn't find "it". After looking through the window coverings section of Bed, Bath, and Beyond, and feeling quite defeated, I strolled through the Shower Curtains. I actually found something I kinda liked. Selling this idea to my Manly Husband was going to be tricky though especially when I hung the shower curtain up. Totally girly? I sure thought so but the Man comes home and I show him the damage and he says "I like it. It's whimsical." The Whimsical Peacocks were here to stay.


Our first night with the Peacocks were lovely until the sun came up. I soon enlisted the help of my Mama, her trusty Sewing Machine named Sue, and for decorating support, my Auntie Ann. We went on the hunt for something to sew behind the Peacock, like real a curtain. Our hunt ended in the Shower section of good ol' Bed, Bath and Beyond where we found a fabric liner that did the job.

Mama and Sue hard at work
Installing the tie backs was a family affair as well. I measured, my Dad installed the hook, Chad was there for moral support and my Mom supervised.

Whimsical Peacocks in all her glory

The Old Boudoir
The New Boudoir

The Table That Keeps On Giving

Goldie
This is another of the pieces of furniture my Dad purchased for me when I moved into my first home. The table is sturdy as heck but the gold was awful, not to mention the floral pattern. Barf. I had hoped to replace it one day when I found something that I loved so I planned to keep it the way it was, in all of its Goldie goodness. A few years back a friend of mine gave me the idea of spray painting it and recovering the chairs. Here enters Brownie ...

Brownie

In my recent re-deco overhaul of Family Room, I realized I still hated Goldie Brownie and the brown color didn't really go with anything in the kitchen since the color scheme is Red, Black and White.

So here is what I did:


Meet Blackie

Friday, August 19, 2011

Drag Out The Paint Brushes, Again

It took me 8 years to get sick of our old bedroom set but only 8 days to get sick of the dark wall in our bedroom and decide to re-paint. I had put up a bunch of color swatches on the wall and we narrowed it down to blues and purples. I thought the purple would go better with the color tones in the wood so I pulled the trigger and painted the wall. I then had painters remorse. I didn't want to have a girly master bedroom and I think I just made it even more girly than it was before. Crapola. Strangely enough Chad likes it. I'll run with it for now. It's just paint anyway, right?

Before
After

Thursday, August 18, 2011

Out With The Old And In With The New

My Dear Ol' Dad was kind enough to buy me some furniture when I moved to Orlando. I wasn't a huge fan of this bedroom set but it was free and more importantly, a really good quality of furniture. I wasn't going to replace this with some cheap-o pressed wood set so I did my best to make it work.


Then the time came when I could stand it no longer. That took about 8 years. I used the money that I made selling the old set to go towards the new set set I picked out but I am all about deals and Ashley Furniture Home Store didn't have any at the time. So we slept and lived in bedroom disarray for about 5 months.


Just about when I was really loosing my patience and having to go into three separate rooms (closet, guest bedroom, junk room) to get dressed, Ashley had a sale. Say hello to our new friend, Porter. Mmm, I love him.


Tuesday, May 17, 2011

Dirty Looking Grout - Be Gone!

Once upon a time I used to have really clean looking tile and grout. Over time the grout started looking a grey color instead of Biscuit (cream). I tried to clean it, scrub it, steam it and even bleach it ... nothing worked.


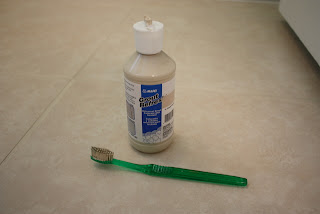
Then one day while I was perusing around the Home Depot I spotted something called Grout Refresh and like the name says, it refreshes your grout. For $8 I thought I'd give it a shot.


Step One: Clean grout.

Step Two: Spread evenly using a toothbrush working the colorant into the grout joint using a back-and-forth motion to allow the colorant to penetrate the grout.


Step Three: After colorant has dried for 30 to 60 minutes, lightly mist the surface with water and let it stand for up to 5 minutes. Remove excess colorant from tile surface using water and a white nylon scrub pad.

Before:


After:

Oohlala. Me likey.
 

Made by Lena